Hi guys!
It’s Naomi Findlay here, your Rapid Renovation expert!
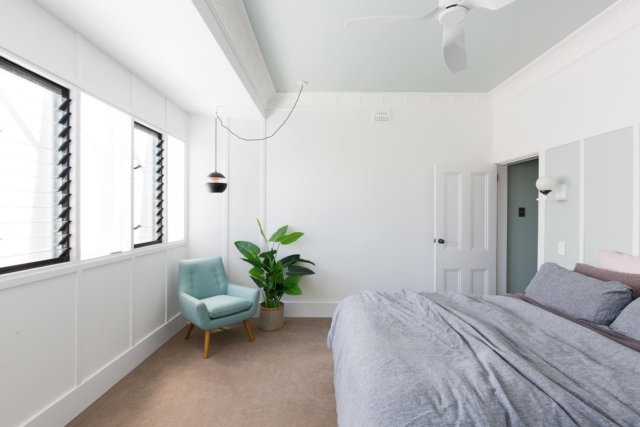
If you’re going to renovate or refresh a room with a fresh lick of paint, do not forget your ‘fifth wall’. Fifth wall? The ceiling!
The ceiling is an important surface that is often overlooked until everything else has been updated. You want your ceiling to complement the rest of the space – add to the look and feel of your room.

Preparation is Key!
If you want your DIY job to look professional, ensure you take time with your preparation. Patch up existing damage, and sand, sand, sand! Also remove any furniture or fixtures that can be taken out, and cover the ones you cannot. Use drop sheets, rags, and painters tape to protect you lights, ceiling fans, and cornices.
Your Ceiling Doesn’t HAVE to Be White
Have a think about what colours and textures would complement the rest of the room. Consider an exposed concrete or pop of colour as an antidote to a boring and dated design.

Do the Math!
Now that you know what colour you’re using, jump online to Taubmans. Taubmans have an online calculator that will leave you with the perfect amount of paint.
Time to Paint!
If you are working with a new plasterboard, always make sure you seal it before you apply your coats of paint. If not, give your paint a solid stir, and get ready to start painting.
The average ceiling will take 30 minutes to paint, so make sure you give yourself enough time to coat the whole surface without having to rush. Using an angled paint brush, start in the cornices. You can begin using a roller and roller tray for the rest of your ceiling when you have coated around ten centimetres of the edge.
Ceilings are messier and more tiring than walls. To lighten your load and get rid of any extra paint, tap each side of the roller thoroughly after you coat it with a small amount of paint.
It will be easier to reach if you attach your roller to a pole. Apply the paint in a ‘W’ or ‘M’ motion in small sections, ensuring the roller remains flat against the surface at all times. To help create a smooth finish and remove any dripping paint; go over the already painted area with a very light coat when you’re halfway through.
Before starting on the second coat, allow the first coat to dry for a full two hours.


 Naomi Findlay is an experienced interior designer, project manager and stylist who also loves sharing her passions and experience by teaching others.
Leave a Reply