Welcome to the renovation of the little house on Carrington street – we like to call The Carrington House
This renovation is going to be officially a slow one, but it’s a home renovation that you don’t want to miss! Piece by piece we will be showing you every single part of the decision and process making and the challenges of each room transformation
So, in that saying, we will begin by starting off with the first room of the Carrington House. From derelict to dreamy and the perfect combination of construction, interior design, and bedroom styling …
We will show you how we transformed this space into a bedroom makeover worth watching!

So How Did We Pull this Room Transformation off?
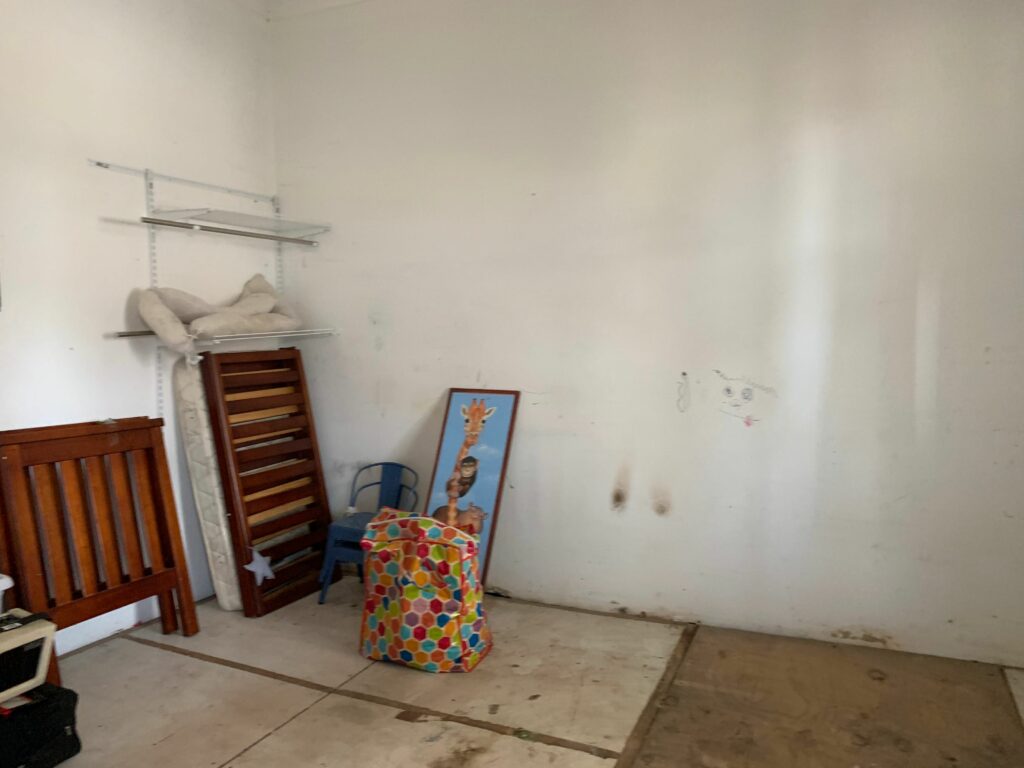
DEMO
With our safety glasses, hat, and covered shoes it was time to start our demolition.
It was quite an easy demo because our ceilings and walls of the room were already Gyprock. However, it was in need of some serious TLC but we thought to keep it there to reduce the amount we took to the landfill.
The floors had old wards and we had some particle boards and ply underneath. Once we took cleared the floorboards we removed the bearers the joints and did a really good subfloor clean up
During our demolition, we ran into a little problem on the way…
We had realised there was an ongoing water leak that causes a bit of wood-rotting damage. However, after finding the source of the leak, it was a quick fix and it was back we go with the demolition.
A quick tip to remember…
During any renovation, it is important to always have a quick meeting between you and your building team. Chat about all the potential challenges and share your plan and complete vision
This is the perfect way to create less stress down the track and can help save time and money on any potential issues on the way
To watch the behind the scenes of the demolition, simply click the link below…
THE REBUILD
Flooring Structure
We had to add joist hangers to the structure of our flooring because it was too close to the dirt. We used some termite-proof red alert timber structure and then cleared a small amount of dirt underneath
French Doors:
Because of the water damage, we had to lay a new concrete flooring to give us a new sturdy, strong and level location for our doors
We decided to install rebated French doors from Humes Doors.
Keeping the original width of the house by using a sidelight on either side of the French doors. Once it was built into a unit by one of our tradies, it was ready to be installed
Thinking about practicality and security, we decided to add an inviguard security door. The beautiful 312 stainless steel mesh door was installed inside of the French Doors
Quick Tips:
- Water and timber doors are a definite no no…
- Add an oil base prime to the: tops, bottoms, sides and MDF panels to the little edges to help protect from any water damage
To watch the behind the scenes of week 2 where you can watch us install the French doors, simply click below..
PREpPING THE WALLS
With the decision to keep the existing Gyprock walls, it was time to give it some much tender loving care.
Our Gyprock experts came in from Hunter Lining Projects to help turn our walls into something new again! They added a nonshrinking base coat, and once that dries they will be skimming it with a topcoat
Now its time for some fun…
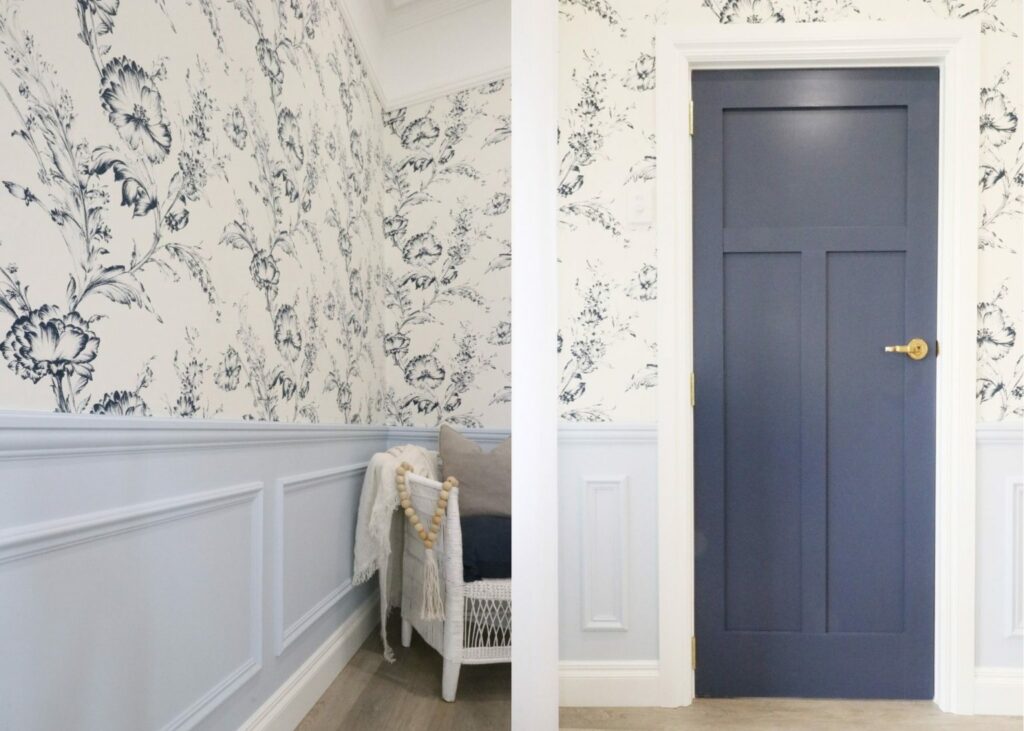
Here comes time to adding our trims, skirting, and interim and picture rail. We used primed FSC certified real timber for our trims, and a 123 mil thick skirt.
Now for our interim chair rail we decided to go off 900 mm off the floor. There is no right height to actually install your interim chair rails or even your picture rails.
We recommend looking at the overall height, dimension, and practically of what is going to work in the room. Also, it’s important to consider the scaling of the room and what is going to actually look good.
Due to the heights of the doors which we had to keep due to the heritage of the house. We Installed our picture rail at 2700 mm off the flooring and then added some beautiful real plaster cornices to our ceilings
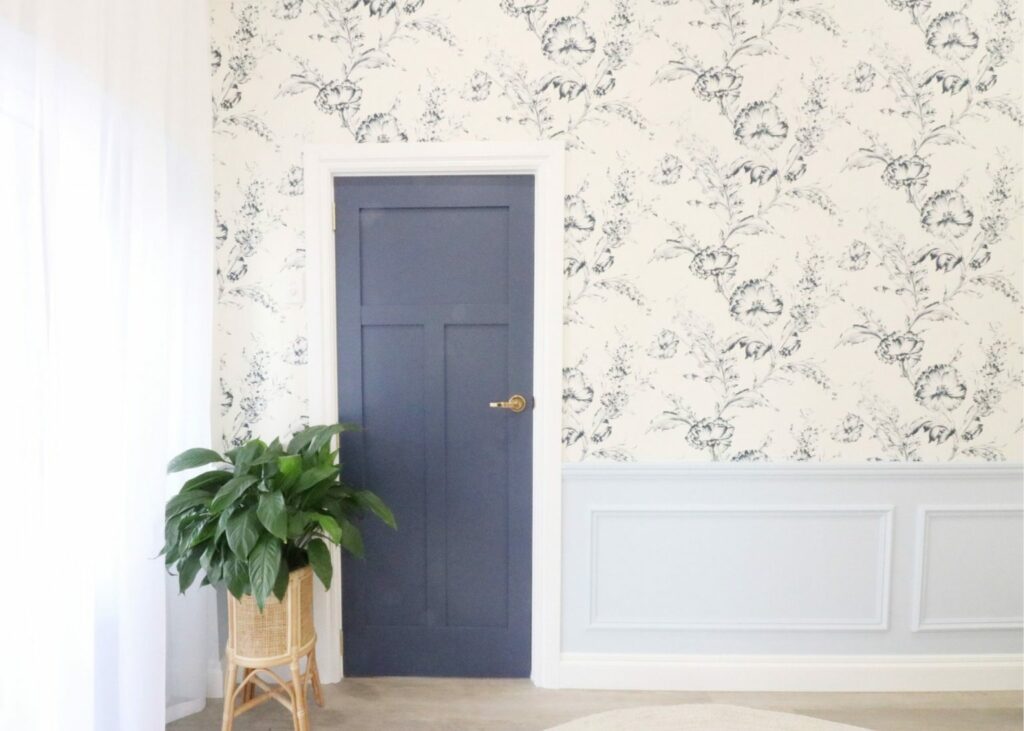
CHOOSING THE RIGHT COLOUR AND WALLPAPER
Choosing the right colour for your space is important. You want everything to flow, match and compliment each other especially when wallpapers are in the picture
A quick tip is to have a sample of your wallpaper when choosing the colour of your paint. Here you can pull colours side by side from the wallpaper to get your perfect shade.
That wraps up on week 3! To watch the behind the scenes simply follow the link below…
finalising THE WALLS
Its now time to prep to paint!
To prep our walls we started cleaning everything out, so we are able to tape up the corners and trims. Everything was then sanded down, it was time to spray our undercoating.
We used Taubman’s Ultra Prep undercoating to spray the entire space. Once we finished, we gapped all the spaces between the trimming to help with the adhesive for applying your final coat of paint.
It was then time to add our wainscoting feature to our walls.
Since the width of each wall was different we decided to go 100mm from each wall, between each panel, from the skirt, and from the chair rail. We then decided to divide it up to create two to three whole rectangles
Using a spray gun, we the remainder of the space ending with painting the door. With a small paintbrush, we ran enamel oil paint for the skirtings and picture rails
Now for our wallpaper…
We went with a 64cm pattern repeat paste navy floral wallpaper
Because it was a pattern repeat, we had to make sure that we were measuring and cutting each piece properly to get the pattern to match on the wall
FLOORS:
We decided to go with Vinyl in the colour called Emire for our floorings. It looks like timber but its actually a vinyl plank specifically a Virtue from Gerflor
Before installing our floors, we prepared by substrating the floor to level and smooth out bumps. Then it was time to apply sealant and followed by an adhesive to lay down the vinyl flooring
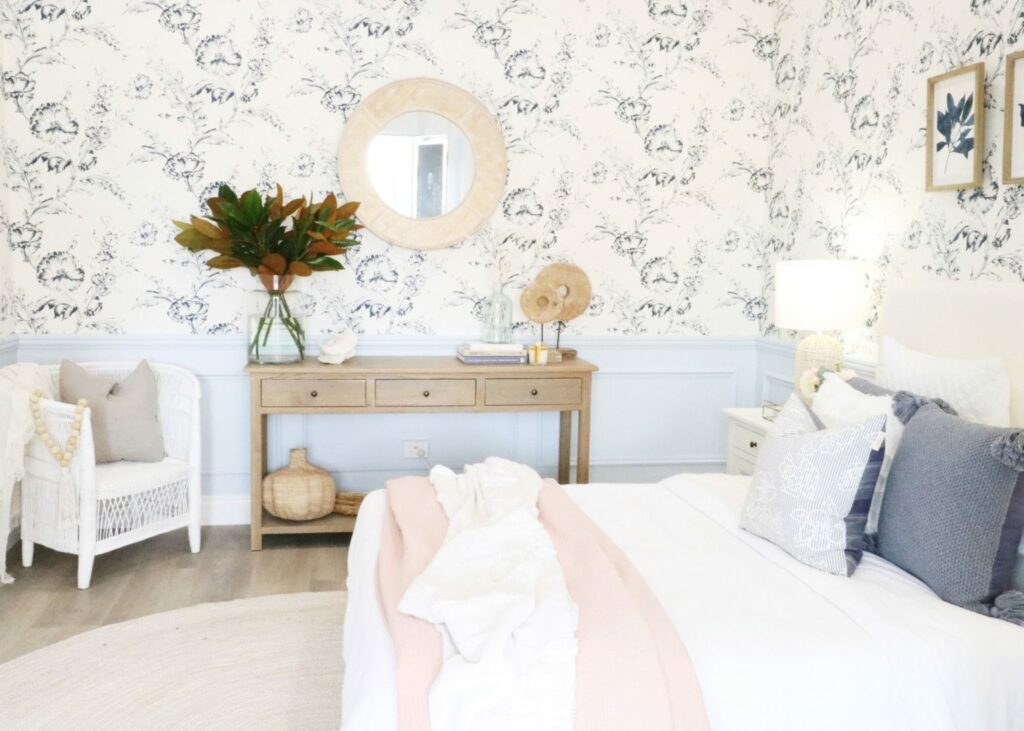
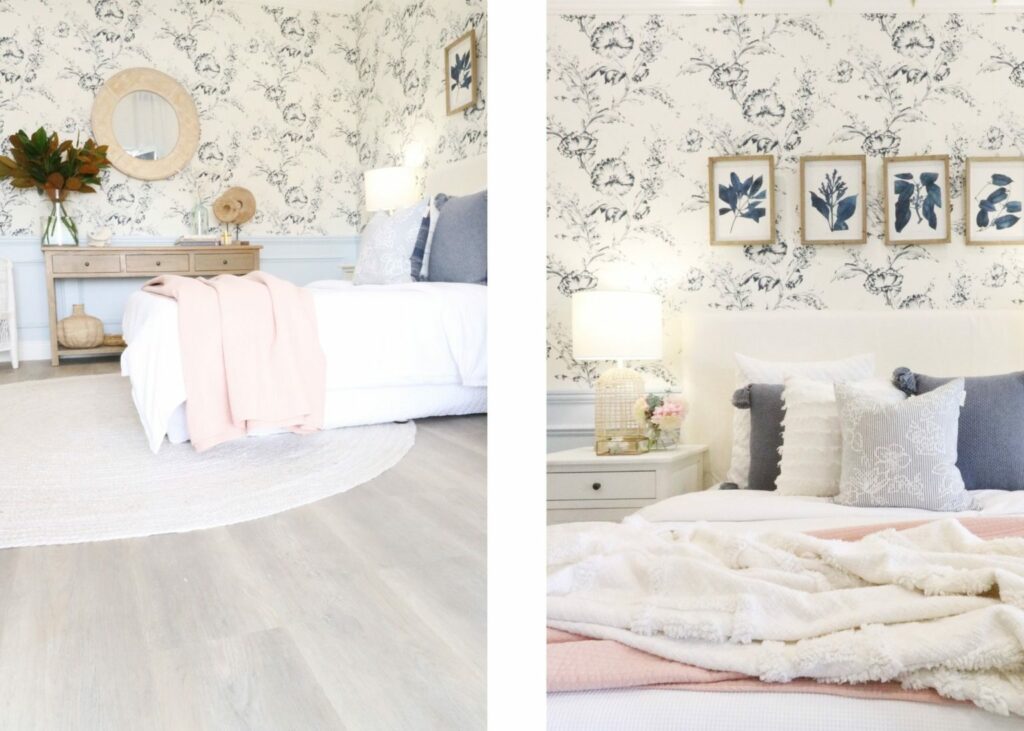
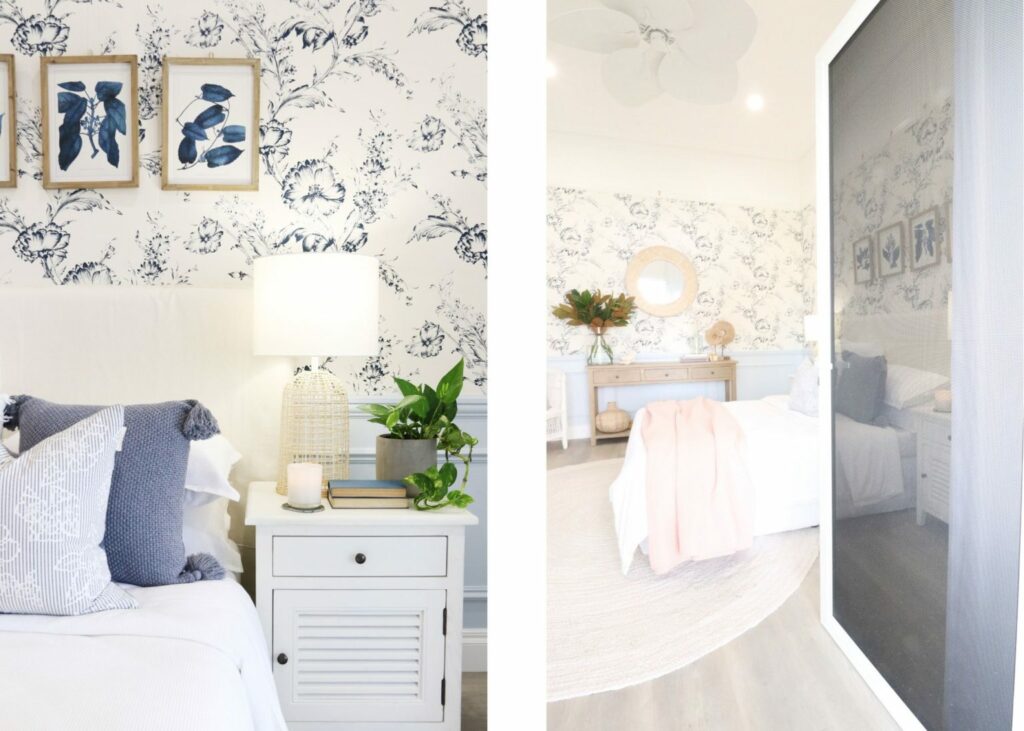
STYLING
After such a long process, we can now say that we are finally done with our space!
It’s now time for the fun bit of things…
It’s time to style our room! We decided to turn our space into a bedroom, adding beautiful and dreamy furniture to create a space to die for!
And that wraps up on our Room 1 transformation on the Carrington House
To watch the behind the scenes on the final week of the transform click below…
Or keep scrolling to see final photos of how our room transformation turned out…

Want to know what exact colors, finishes, and products we used in our renovation?
arches & Skirt, Picture rail & wall above rail:
Semi Gloss, Brillant White From Taubmans Paint
Internal Door:
French Screen Doors:
Pearl White, Alspec Invisi Guard316 Stainless Steel Security Screen French Doors.
FLOOR
We like to say a special thanks to our supplier and tradie team, for helping out with the reno!
Find out who helped us made our renovations dream come true…
Supplier Team:
- Beaumont Tiles
- Bristol
- Aslpec
- Gerflor
- Gyprock
- Intrim
- Hume Doors
- Cemintel
- Draperly
- Brosa
- Kalora
- Saddingtons
Tradie Team:
Looking for an easier way to plan your renovation from start to finish?
Make your dream home a reality, no stress, no guesswork with our FREE Beautiful Renovations masterclass CLICK HERE TO JOIN

 Naomi Findlay is an experienced interior designer, project manager and stylist who also loves sharing her passions and experience by teaching others.
Leave a Reply